If you already have a container image built and pushed to a registry, Porter can deploy it directly without managing your build process. This approach works well when you have an existing CI/CD pipeline that produces Docker images, or when you’re deploying third-party images that you don’t build yourself. Porter supports all major container registries including Amazon Elastic Container Registry (ECR), Google Artifact Registry (GAR), Azure Container Registry (ACR), Docker Hub, and any registry accessible via a standard Docker image URL. This guide covers deploying pre-built container images. If you want Porter to build your application from source code, see Deploy from a GitHub repository.

Quick deploy

Deploying a container image takes just a few steps since you’re skipping the build process entirely.

Specify your image

From the Porter dashboard, navigate to your project and click Create Application. Porter defaults to the GitHub deployment flow. To deploy from a container registry instead, click Or, deploy from a container registry in the top right. GitHub deployment page with container registry link You’ll see two input fields: one for the image repository URL and one for the tag. Enter the full path to your image in the repository field. The format depends on your registry:
  • Docker Hub: docker.io/username/image or just username/image
  • Amazon ECR: 123456789.dkr.ecr.us-east-1.amazonaws.com/my-app
  • Google Artifact Registry: us-docker.pkg.dev/project-id/repo/image
  • Azure Container Registry: myregistry.azurecr.io/my-app
In the tag field, enter the specific version you want to deploy—this might be latest, a semantic version like 1.2.3, a git commit SHA, or any tag you’ve pushed to your registry. Container registry image URL and tag inputs

Review your application

Once you’ve entered both the image URL and tag, Porter creates an application configuration for you. The application name is derived from your image name. Deploying docker.io/myorg/api-server:v2.1 creates an application called api-server. Application card showing derived name and Docker image Porter provides sensible defaults for resources: 0.5 CPU cores, 1 GB of RAM, and a single instance. Since Porter can’t inspect your pre-built image the way it can with source code, you’ll need to specify the port your container listens on (for web services) and optionally override the start command if your image’s default CMD isn’t what you want to run.

Deploy

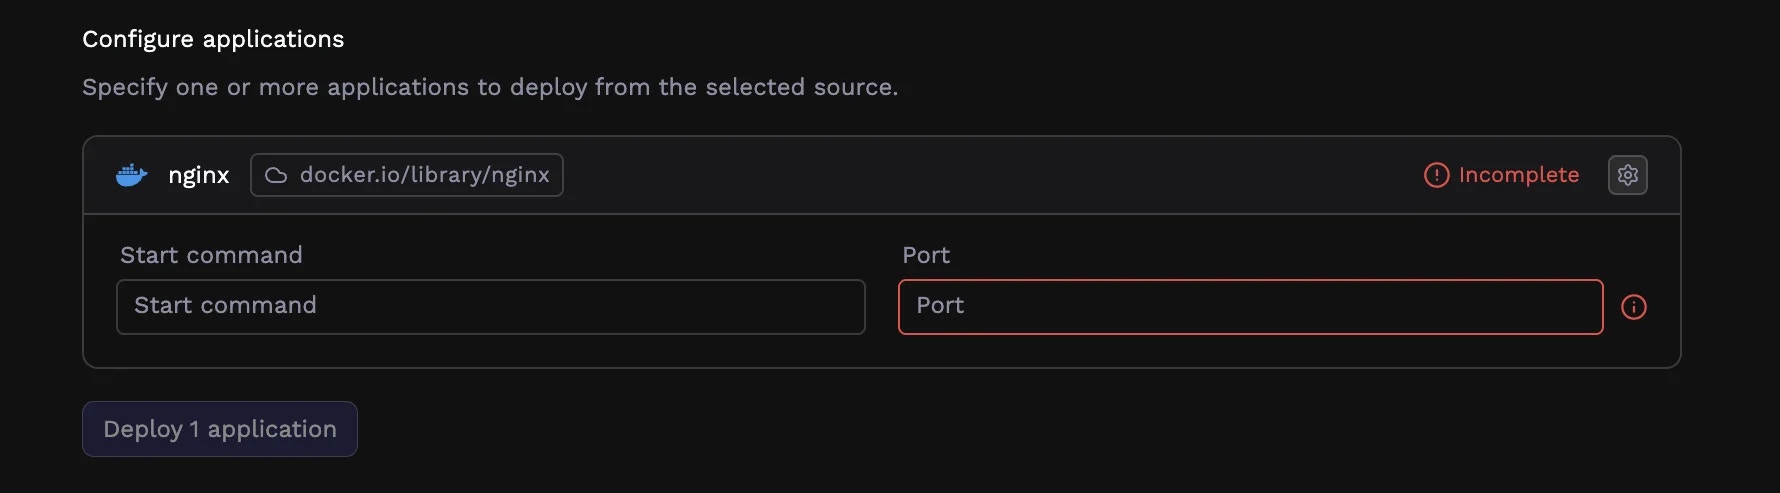
Once the application is created, you can review the app’s start command and port, and click the configure button (gear icon) on the card to see other pre-configured values. When ready, deploy using the Deploy button. Application card with configure and deploy buttons Porter pulls your image and starts running it. The sections below cover customizing the configuration when you need more control.

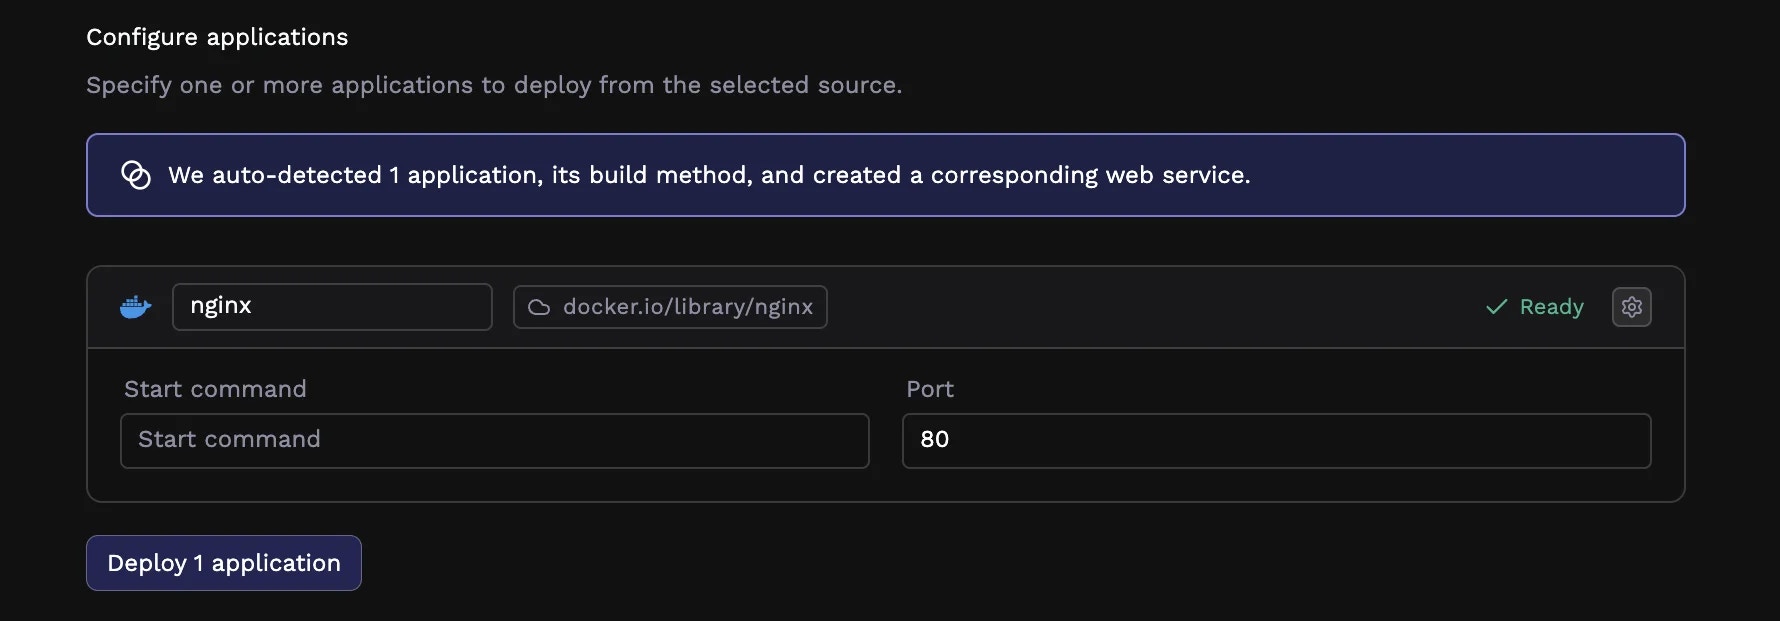
Customizing your deployment

Since Porter isn’t building your image, configuration focuses on how to run your container rather than how to build it.

Understanding the container registry flow

When you deploy from a container registry, Porter:
  1. Pulls your specified image from the registry
  2. Runs it with your configured services, resources, and environment
  3. Manages scaling, health checks, and networking
There’s no build step, no Dockerfile parsing, and no GitHub Actions workflow. Updates happen when you push a new image tag and tell Porter to deploy it (covered in the Updating Your Application section). This makes container registry deployments faster to set up, but requires you to manage your own build pipeline. It’s ideal when you already have CI/CD infrastructure or when deploying images you don’t control.

Private registry authentication

If your image is in a private registry that requires authentication, you’ll need to configure credentials. How you do this depends on your registry type.

Cloud provider registries

For ECR, GAR, and ACR, Porter handles authentication automatically when your cluster runs in the same cloud provider. Your cluster’s service account has permission to pull images from registries in the same account or project. If you’re pulling from a registry in a different account, or if automatic authentication isn’t working, you can configure credentials through Porter’s integrations settings or by adding image pull secrets to your cluster.

Docker Hub and other registries

For Docker Hub private repositories or other registries requiring authentication, your credentials need to be configured as a Kubernetes image pull secret at the cluster level. Reach out to us to set this up for your cluster.
Using an authenticated registry that isn’t your cloud provider’s native registry (such as GitHub Container Registry or a self-hosted registry) requires additional manual configuration, including creating an ImagePullSecret and referencing it in your deployment.

Configuring services

A Porter application consists of one or more services—web services for HTTP traffic, workers for background processing, and jobs for scheduled tasks. By default, Porter configures a single web service. For a complete guide to service types, resource allocation, networking, environment variables, health checks, and more, see Services.

Updating your application

When you push a new image tag to your registry, Porter doesn’t automatically deploy it. You have two options for triggering updates.

Manual updates

From your application’s dashboard in Porter, you can change the image tag to deploy a different version. This is useful for one-off deployments or rollbacks.
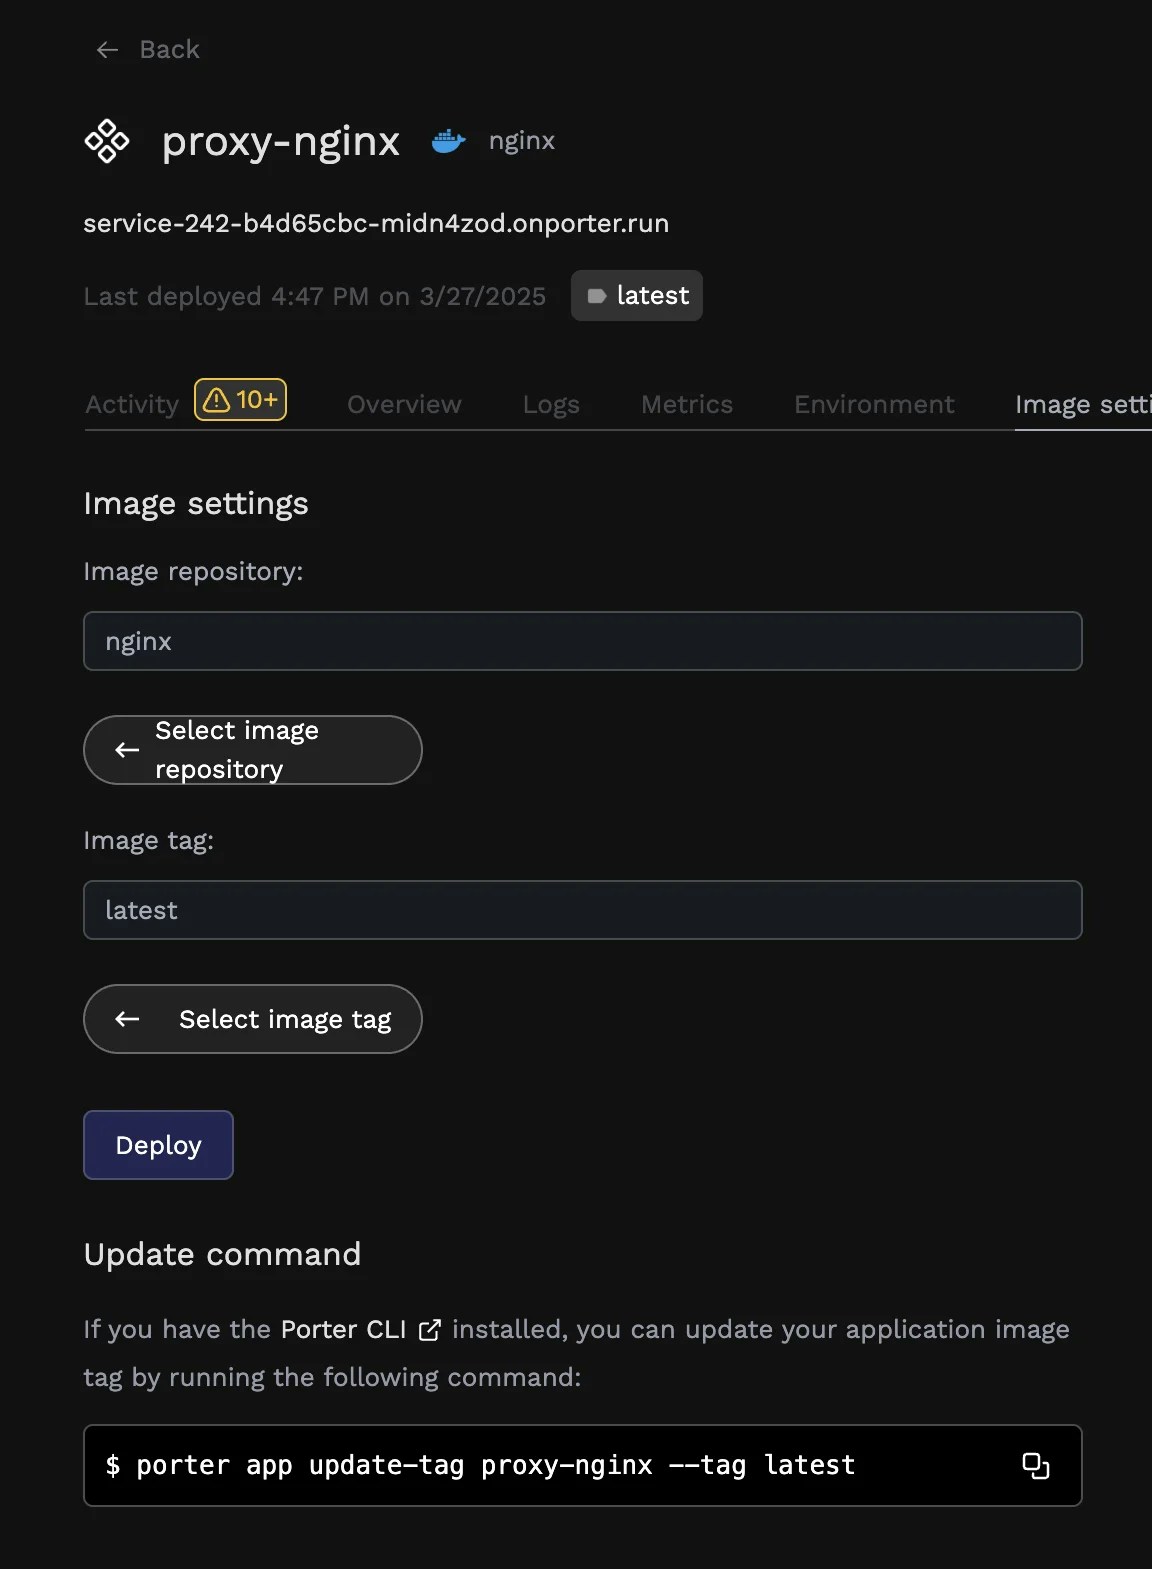
 Update tag interface

CLI updates

For automated deployments, use the Porter CLI to update your application’s image tag:
porter app update-tag APP_NAME --tag TAG_NAME
Replace APP_NAME with your application name in Porter and TAG_NAME with the new image tag you want to deploy.

CI/CD integration

The most common pattern is adding the Porter CLI command to the end of your existing CI/CD pipeline. After your pipeline builds and pushes a new image, it calls Porter to deploy that tag. For example, in a GitHub Actions workflow:
- name: Build and push image
  run: |
    docker build -t myregistry.com/myapp:${{ github.sha }} .
    docker push myregistry.com/myapp:${{ github.sha }}

- name: Deploy to Porter
  run: porter app update-tag myapp --tag ${{ github.sha }}
  env:
    PORTER_TOKEN: ${{ secrets.PORTER_TOKEN }}
This keeps your existing build process intact while letting Porter handle the deployment. You maintain full control over when and how images are built, and Porter takes over once you’re ready to deploy.