AWS
The default Porter-managed Kubernetes cluster on AWS uses a Network Load Balancer (NLB) which forwards traffic to an on-cluster Nginx Ingress Controller. Whilst this provides the best performance, some users have a requirement to only provide access to the applications deployed on the Porter cluster from a set of allow-listed IP ranges. As an enterprise feature, Porter supports switching out the default NLB for an Application Load Balancer (ALB). This allows the user to allowlist up to 20 CIDR addresses using an AWS Security Group.Requirements
- A Porter-managed Kubernetes cluster
- Access to your DNS provider. For this example, we will use CloudFlare, but Route53 is also supported.
- A domain name which can be wildcarded. For this example, we will use
stefan-2.porter.run - The list of CIDR addresses to whitelist. These must be full CIDR ranges, such as 10.2.3.4/32
Contact Porter
This process isn’t currently available through the dashboard. Until then, you must arrange a maintenance window with Porter. If you have a support agreement with Porter, reach out to your account representative. If not, drop us an email to [email protected] using the below format:Project Namecan be found in the top-left corner of your Porter dashboard.Cluster Namecan be found in theInfra SettingsorInfrastructuretab of your Porter Dashboard.Wildcard Domainis the domain that you will use for protecting all applications. If you providestefan-2.porter.run, bothstefan-2.porter.runand all subdomains ofstefan-2.porter.runwill be added, such asdev.stefan-2.porter.runandtesting.stefan-2.porter.run.Allowlisted IP rangesshould be a comma-separate list of valid CIDR addresses including netmasks, for example10.123.3.1/32,10.123.3.19/32,10.123.4.1/32.
DNS Validation
Skip this step if you are using Route53. When your ALB is up and running, you will have to ensure that your new AWS Certificate Manager (ACM) Certificate is validated. AWS does this by creating a CNAME record which must resolve to an automatically generated value. AWS-
In your AWS console, navigate to the region that your cluster was deployed in. You can find this from your Porter dashboard in the
Infra SettingsorInfrastructuresection, in the Configuration tab. - After selecting the correct region, search for “AWS Certificate Manager” in the AWS Console search bar.
-
Select
List Certificatesfrom the bar on the left. - Find the domain name which matches the domain that you provided to Porter, then click on the Certificate ID.
-
The status for this certificate should be
Pending validation.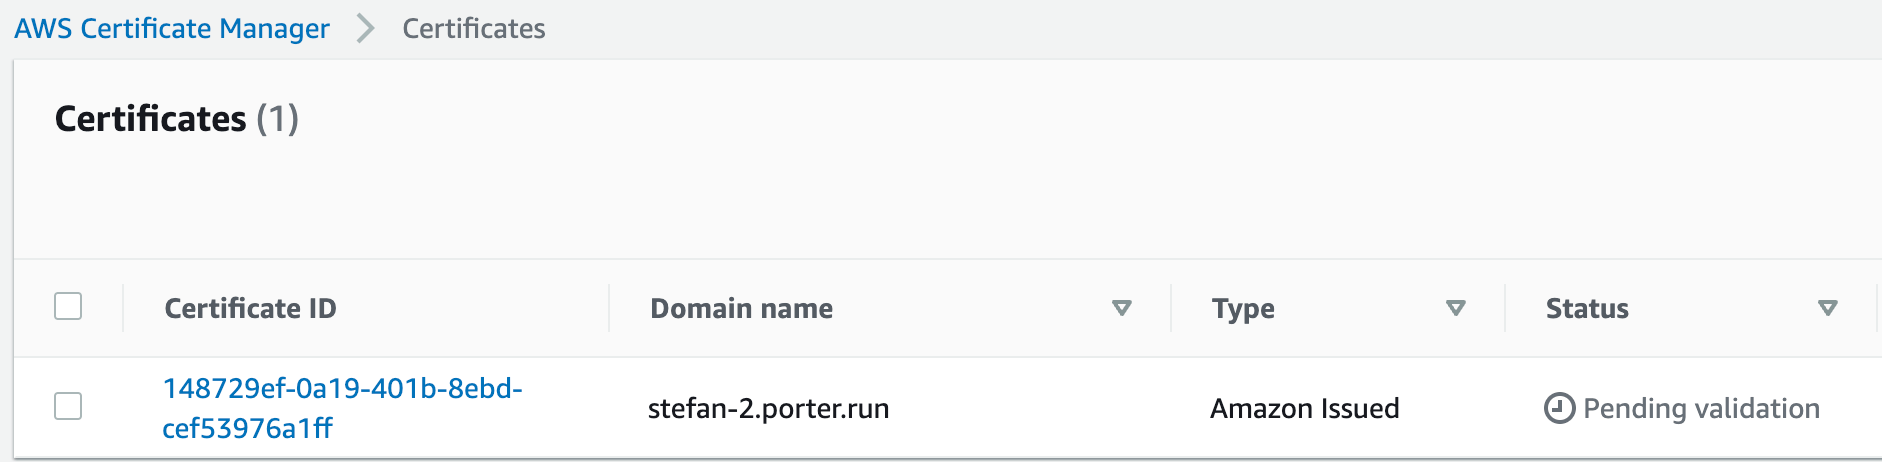
-
Scroll down to
Domains. -
Take note of the
CNAME nameandCNAME value.
- You may see multiple domains here, all with the same CNAME name and CNAME value. No need to worry about these.
- Go to your DNS provider. This will be CloudFlare in our case.
-
Select
DNSthenRecords. -
Create a new record - Select
CNAMEfor type.- Enter the value that you pulled from AWS for
CNAME namein theNamefield in CloudFlare. - Enter the value that you pulled from AWS for
CNAME valuein theTargetfield in CloudFlare. - Ensure
Proxy statusis disabled, and is inDNS onlymode. - Set
TTLtoAuto. - Enter
Porter-managed ACM Certificate Verification for YOUR_DOMAINin theCommentfield. This is not required, but is strongly recommended.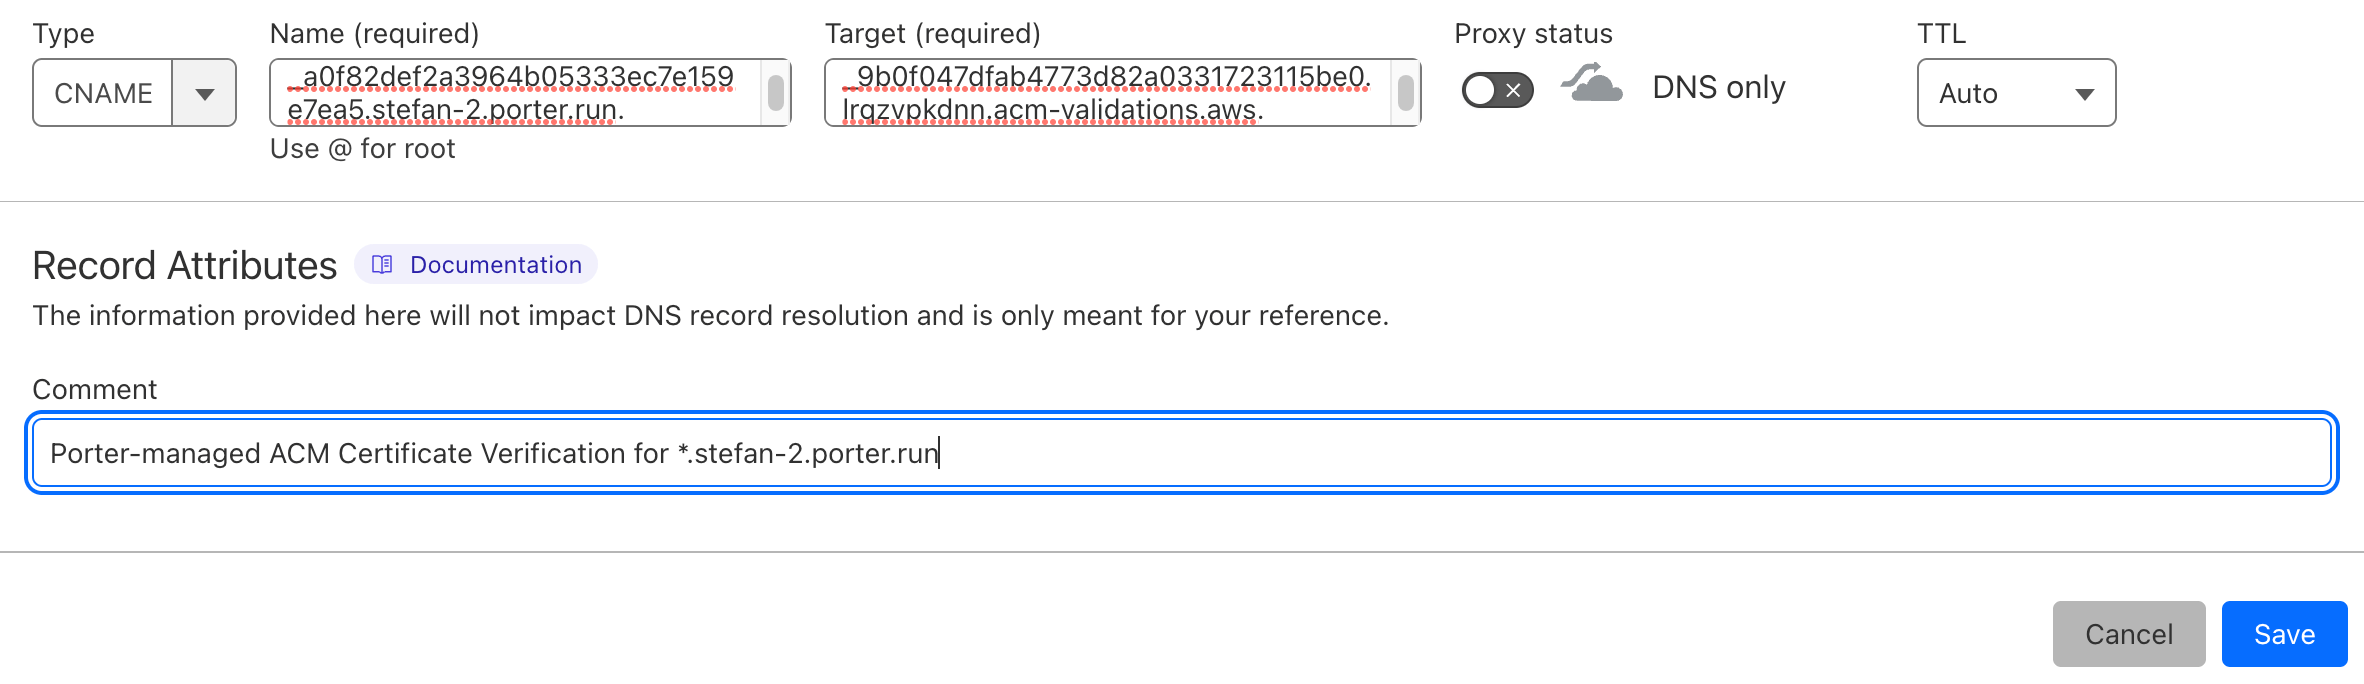
- Enter the value that you pulled from AWS for
- Return to the AWS console.
- Go to the ACM Certificate and refresh the page.
- If the status is still
Pending Validation, wait 5 minutes then refresh again. You should now see that the status isIssued.
- Your certificate is now issued, and can be used by your ALB.
Creating a CNAME for your wildcard domain
As a reminder, we are usingstefan-2.porter.run as the address that we provided to Porter. All of our protected applications will be available at *.stefan-2.porter.run for example myapp.stefan-2.porter.run or whoami.stefan-2.porter.run.
- Go to your DNS provider. We will be using CloudFlare, but the settings should be similar in any DNS Provider.
1 Select
DNSthenRecords. - Create a new record.
- Select
CNAMEfor type. - Enter the wildcarded domain in the
Namefield i.e.*.stefan-2.porter.run. - Enter the ALB domain name in
Targetfield. This will be provided to you by the Porter engineer. - Ensure
Proxy statusis disabled, and is inDNS onlymode. - Set
TTLtoAuto.
- Select
- You can now use this as a custom domain in Porter for you applications.
Adding a Protected Custom Domains to your Application
- Back in your Porter Dashboard, select the application that you would like to protect.
- Select
Maintab, and scroll toNetwork Settings. - Check
Expose to external trafficif not already selected. - Check
Configure Custom Domain. - Enter the FQDN for the application i.e.
whoami.stefan-2.porter.run. - Ensure that
Enabled TLS and automatically create certificatesis UNCHECKED`.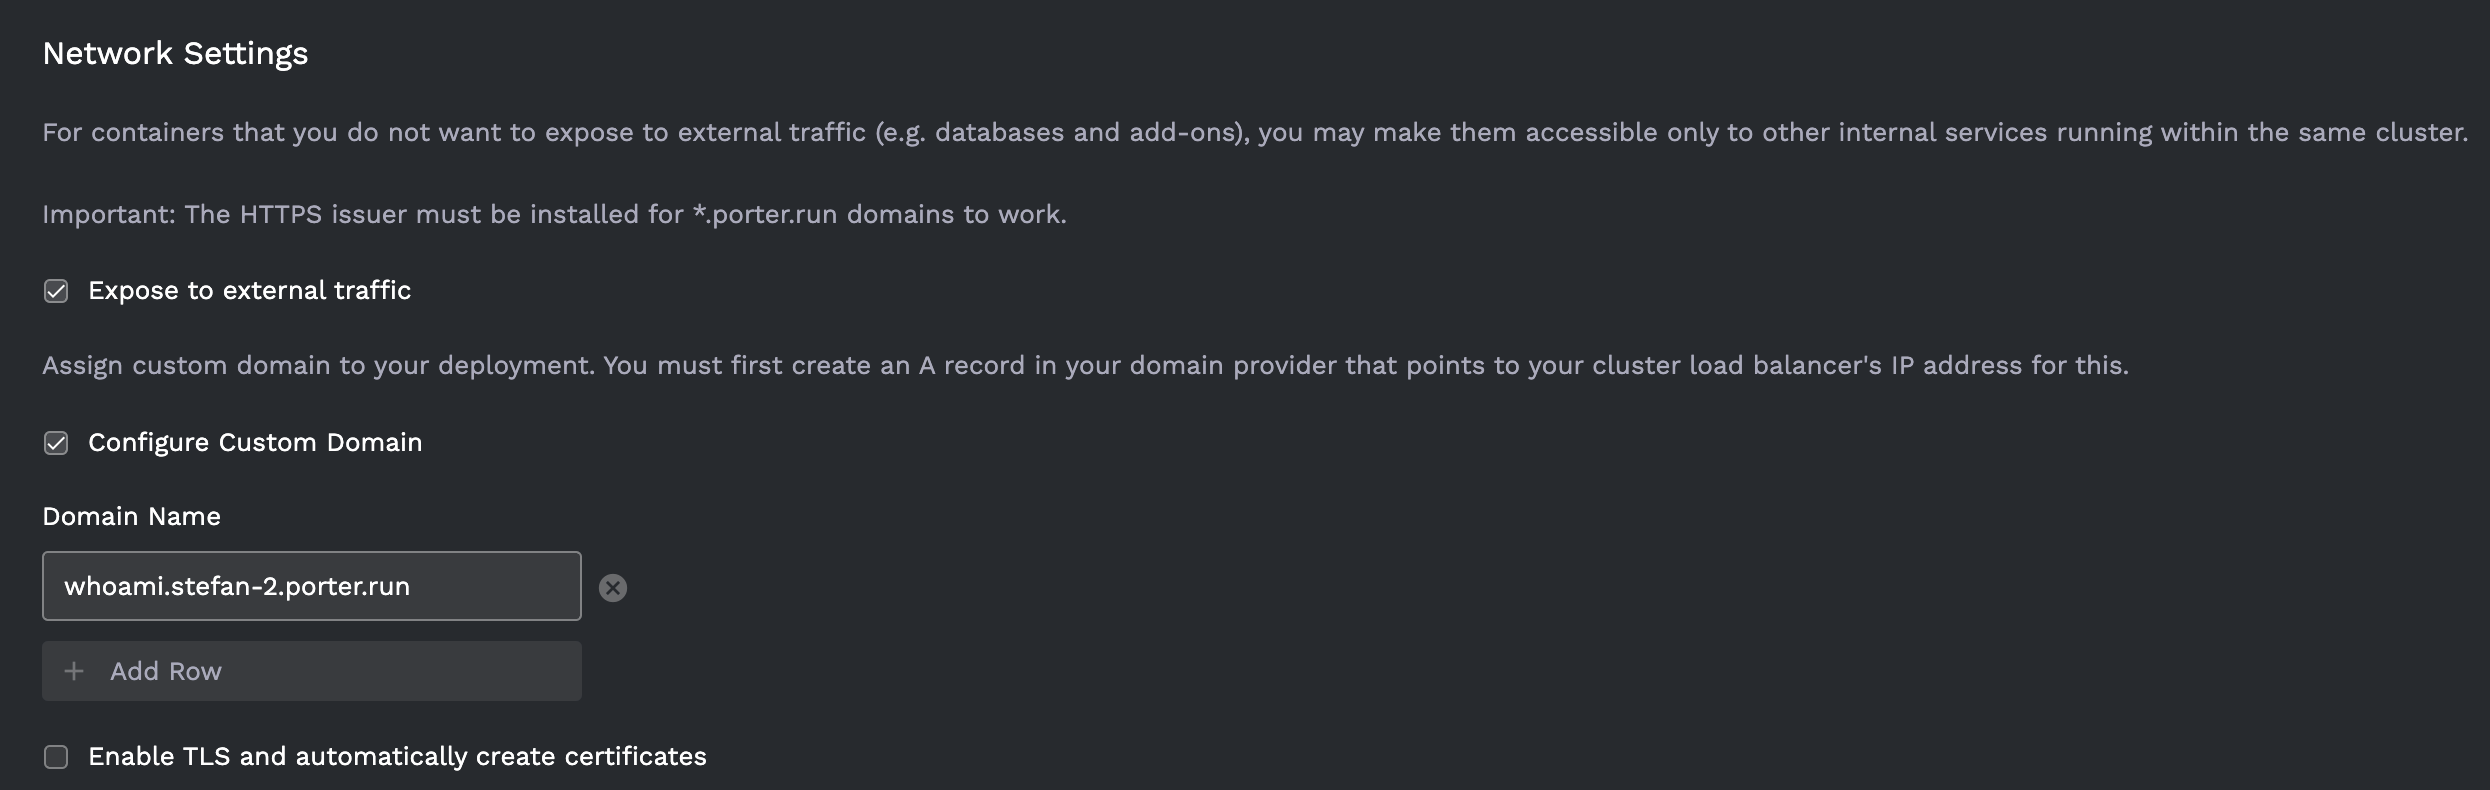
- Done! You can now access the application through the domain at the top of your application screen.
Notes
- You will be able to see the CIDR ranges that you have allow-listed in your AWS Console Security Groups. DO NOT update these from the AWS Console as they will be automatically reconciled to the values that were provided to Porter. This could cause security issues in your architecture. Always update the values through Porter to ensure maximum security.