Setting up Tailscale
Step 1: Create an OAuth Client in Tailscale
Add tag owners to your policy
In the Tailscale admin dashboard, navigate to the Access controls tab and add the following to your policy file: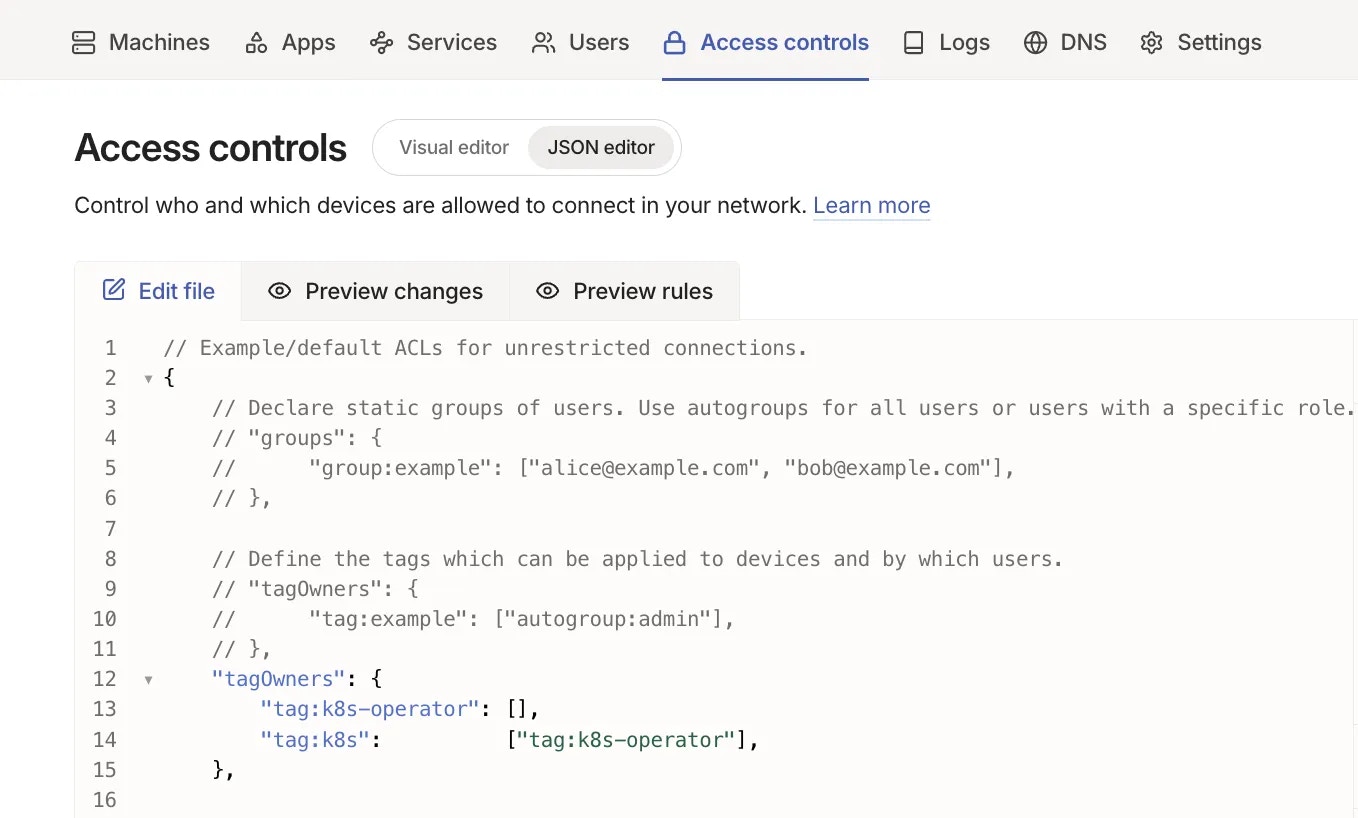
Step 2: Enable VPN on Your Cluster
Enter OAuth credentials
Input your Tailscale OAuth Client ID and OAuth Secret.Click Save OAuth Credentials.
Step 3: Approve Routes in Tailscale
By default, Porter ensures that all Porter-managed applications and datastores are accessible over the Tailnet. Each route must be approved by an admin in the Tailscale Admin Panel.Open the Tailscale Admin Panel
Visit your Tailscale Admin Panel and click Machines.
Find your cluster
Locate the machine named
cluster-ABC, where ABC is the name of your Porter cluster.Approve routes
- Click the three dots on the right side of the cluster machine
- Click Edit Route settings…
- Click Approve All to approve all routes
Subnet Routes
By default, the subnet routes for your cluster and all connected datastores are routed through Tailscale. To add additional subnet routes:- Navigate to Infrastructure → VPN
- Click + Add subnet route
- Enter the subnet CIDR you want to route through Tailscale
- Update your cluster
Troubleshooting
VPN not connecting
If your VPN connection isn’t working:- Verify the OAuth credentials are correct in Porter
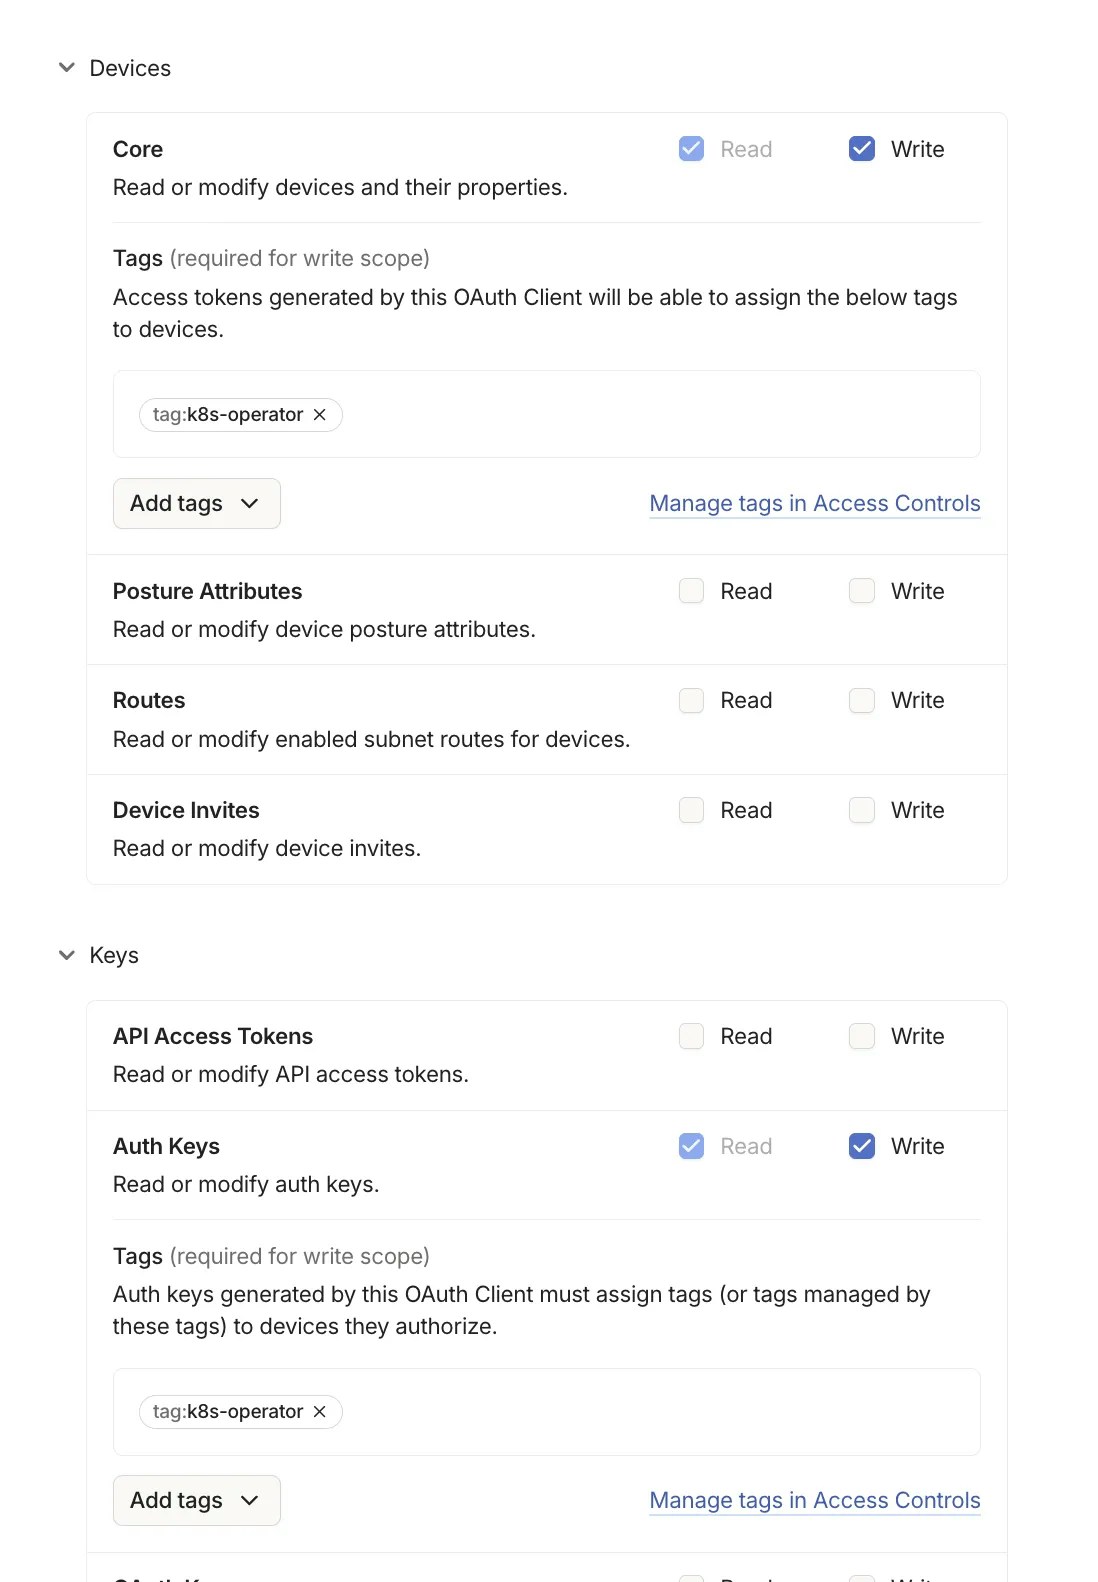
- Check that the
k8s-operatortag is properly configured in your Tailscale ACL - Ensure routes are approved in the Tailscale Admin Panel
Cannot access cluster resources
If you can’t reach cluster resources over Tailscale:- Verify Tailscale is running on your local machine
- Check that routes are approved in the Tailscale Admin Panel
- Ensure your Tailscale client is connected to the same Tailnet
- Try disconnecting and reconnecting your Tailscale client